
Many believe that Landslide Lake is one of the most beautiful day hikes, not just on Vancouver Island, but in all of British Columbia, which is exactly why we added it to our itinerary.
Landslide Lake is located in Strathcona Provincial Park, the oldest provincial park in British Columbia. It is known for its wild mountain scenery, long backcountry trails, and landscapes that make you work for the view. Many guides list this hike as a 20 km or 22 km return trip, but my experience was quite different. Whether it was the winding terrain or the final steep ascent, our trackers clocked in at over 30 km by the time we returned to the car.
It is a long, demanding day, but for the views at the top and the chance to dive into those glacial waters, it is undeniably worth the effort.
In this guide, I’ll share the reality of the trail, from cougar safety and creek crossings to campsite logistics, and what to expect along the way.
This post contains affiliate links, and if you click one, I may receive a small commission at no extra cost to you.
Quick Overview of the Landslide Lake Hike
Location: Strathcona Provincial Park, Vancouver Island, British Columbia
Trailhead: Elk River Trail
Distance: Most guides list this hike as 20–22 km return, but based on our trackers, we walked over 30 km in total.
Elevation gain: Approx. 600–800 metres
Time required: Typically 7–10 hours return — it took us almost 5 hours to reach the lake and about 8 hours in total.
Difficulty: Challenging, mainly due to the long distance rather than constant steep climbing.
Trail type: Out and back
Best time to visit: Late spring to early autumn. We did this hike in July, and the weather was warm and dry.
Good to know: There are several backcountry campsites along the trail, which makes it possible to split the hike into two days if you don’t want to complete the full distance in one long day.
Where to Stay Near Landslide Lake
The most convenient place to stay when hiking to Landslide Lake is Campbell River, which is about an hour’s drive from the Elk River Trailhead. It’s a practical base with plenty of accommodation options, restaurants, supermarkets, and everything you might need before or after a long hiking day.

We stayed at Painter’s Lodge, and it turned out to be a great base for this hike. The lodge is located right by the water, and after spending hours on the trail, it was honestly nice to come back somewhere quiet and comfortable. We actually spent a few nights there and got to explore the area, too.
If Painter’s Lodge is fully booked or outside your budget, here are a couple of other good options in Campbell River:
Naturally Pacific Resort: A newer and more modern option in Campbell River, offering comfortable rooms and good facilities. It’s a great choice if you prefer a more contemporary hotel with everything in one place.
Comfort Inn & Suites: A reliable and well-rated option that offers good value for money. It’s a practical choice if you’re looking for something comfortable without going for a luxury stay.
Campbell River also has several smaller motels and lodges, so it’s generally easy to find accommodation that fits your budget.
Wildlife Safety: Bears and Cougars
Before setting off, it’s important to know that Strathcona Provincial Park is active bear and cougar country. Most hikers think about bears, but cougar sightings are also reported in this area, so it’s worth being prepared for both.
The general advice for black bears and cougars on Vancouver Island is to never play dead; that is a tactic reserved for grizzly bears (which you won't find here). If you encounter a cougar, you need to stand your ground, look as large as possible, and be prepared to fight back.

I initially carried a sturdy stick for a bit of extra security, but I eventually ditched it because it became more annoying than helpful.
My best advice is to carry bear spray in an easily accessible place and consider wearing bear bells to make noise as you walk. Most sections of the trail are very quiet, so making noise, especially when visibility is limited, can help avoid surprising wildlife. Hiking with a partner is also a good idea whenever possible.
Getting to the Trailhead (Elk River Trail)
The trail to Landslide Lake starts from the Elk River Trailhead in Strathcona Provincial Park. From Campbell River, the drive takes about one hour, following Highway 28 (Gold River Highway). The road is fully paved and in good condition, so you don’t need a 4WD vehicle to reach the trailhead.
Parking at the Elk River Trailhead is free, but the car park is not very large. Since this is a long and popular hike, spaces can fill up quickly, especially during the weekends in the summer.
We arrived at the trailhead at around 7 a.m., and even at that time, there were only a few spots left. If you’re planning to do this hike as a day trip, I’d definitely recommend arriving early. Not only does it help with parking, but it also gives you enough time to complete the hike without feeling rushed on the way back.
One important thing to know is that there is no mobile signal anywhere along the trail or inside the park, so it’s a good idea to download offline maps in advance, especially if you’re using apps like AllTrails to navigate.
The Hike: Elk River Trail to Landslide Lake
The hike to Landslide Lake can roughly be divided into three stages: the forest walk, the campsites and river section, and the final ascent to the lake. Each stage feels different, and knowing what to expect makes the hike feel more manageable.
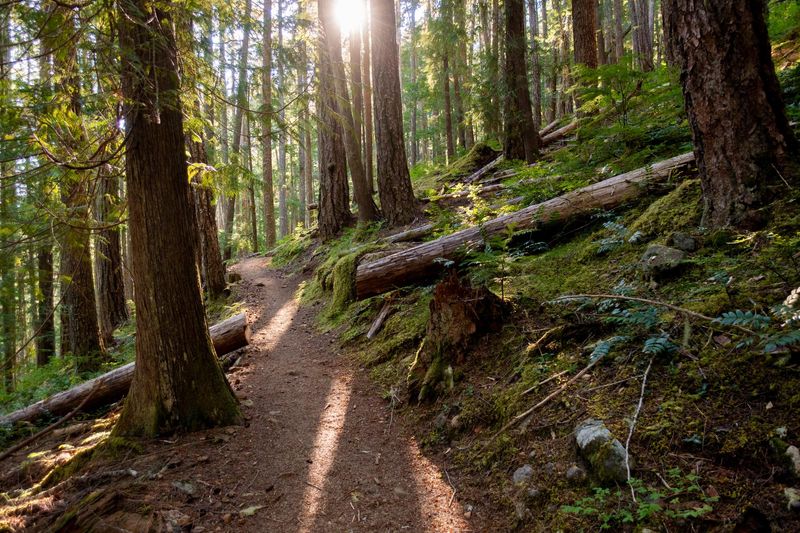
1. The Forest Walk (0–7 km)
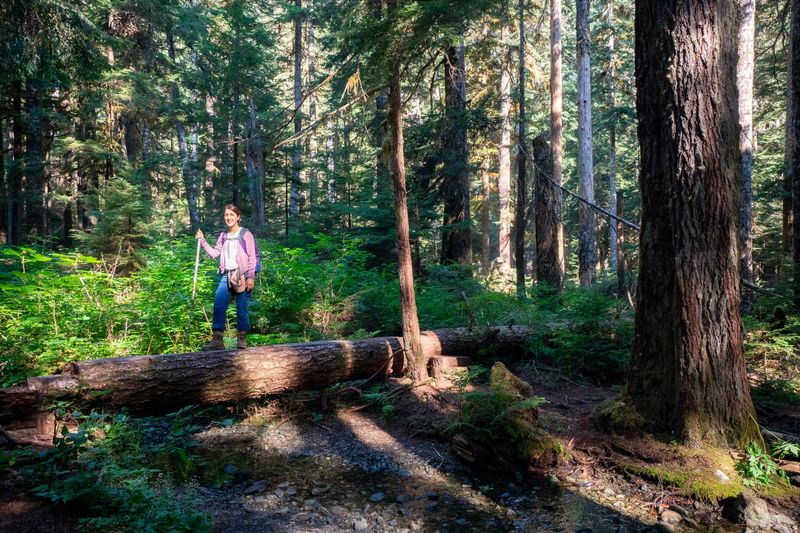
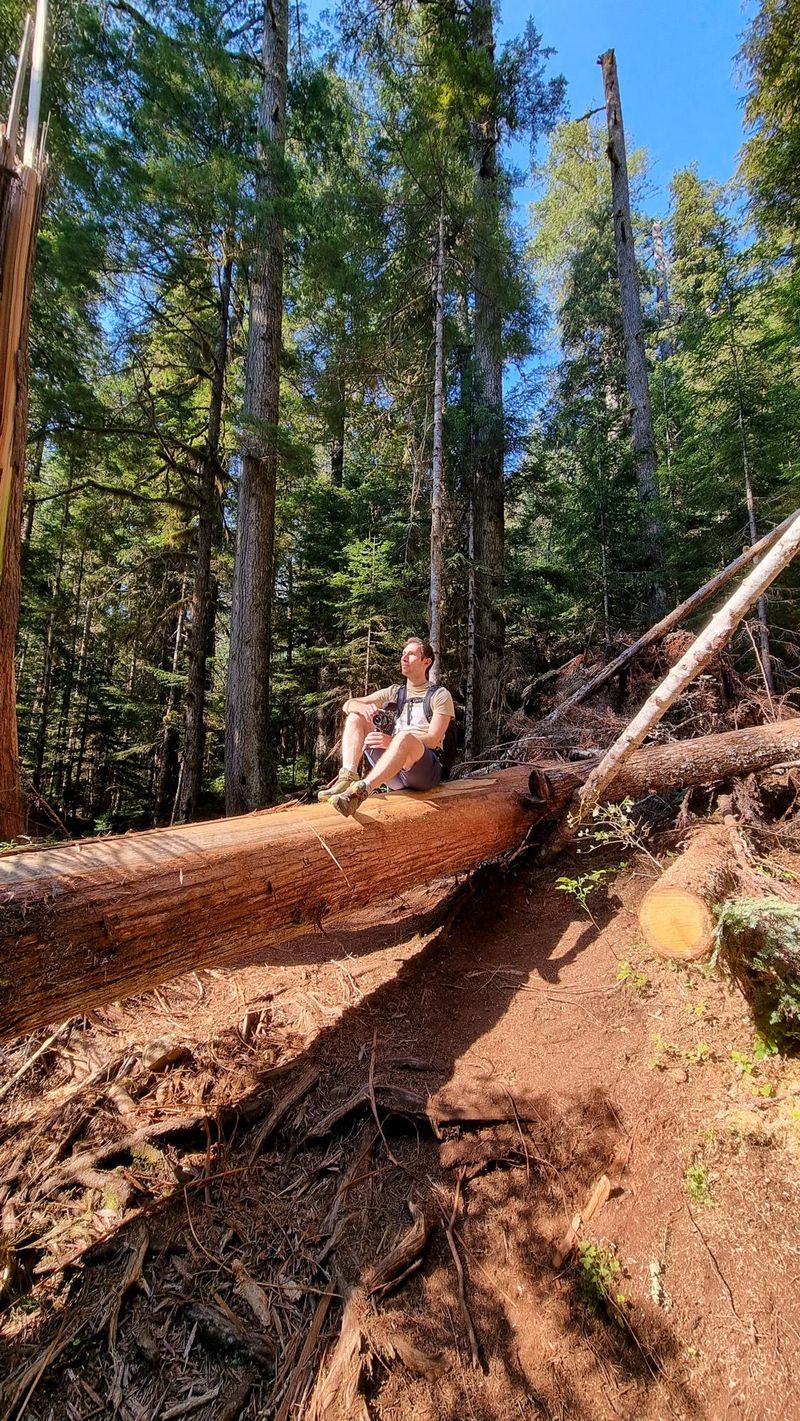
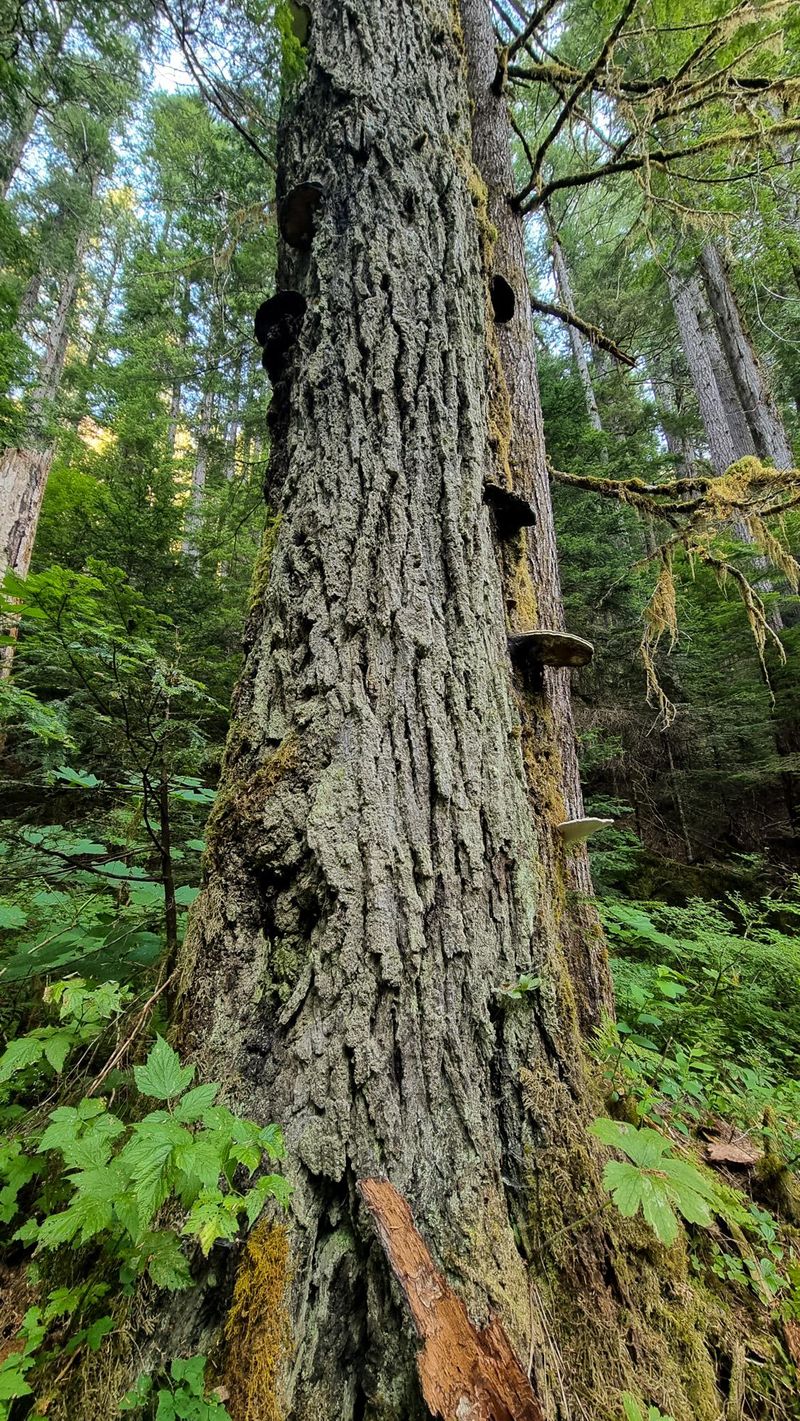
The first stretch of the Elk River Trail is relatively gentle and incredibly scenic. The path winds through old-growth forest and follows the Elk River, making this section enjoyable and not too demanding.
For the first 70% of the journey, the terrain is quite manageable, with mostly gradual walking and only a few obstacles like fallen logs to climb over. At the beginning, the trail felt surprisingly easy, and I remember thinking this hike might not be as difficult as expected.
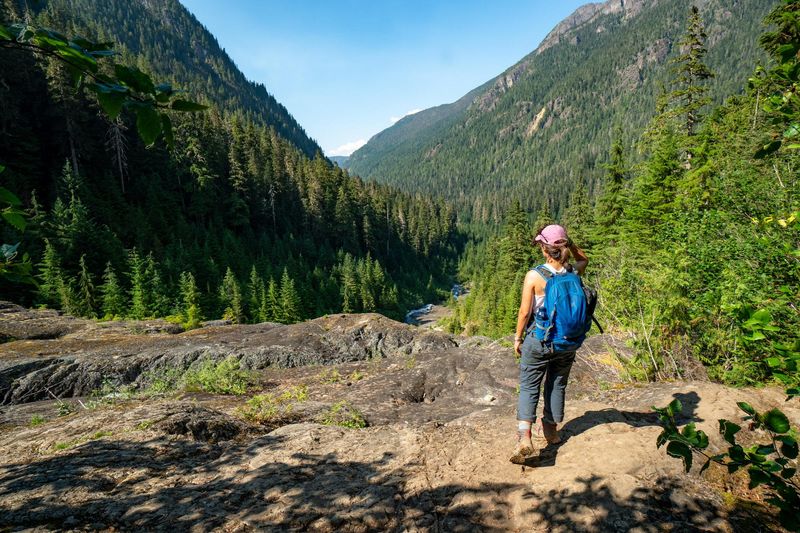
2. The Campsites and the Bridge (8–10 km)
At around the 8 km and 10 km marks, you’ll reach two backcountry campsites along the trail: Butterwort Creek and Gravel Flats.
Butterwort Creek is a good place to stop if you’re planning to split the hike into two days. Since the full distance to Landslide Lake is long, some hikers choose to stay overnight here and continue the next day.
Gravel Flats, located farther along the trail, includes bear-proof food storage lockers. If you’re camping, you must store all food and scented items here for your own safety and to protect wildlife.
There is also a narrow suspension-style bridge in this section. It felt slightly unstable when we crossed it, and we made sure to cross one person at a time. It definitely adds a bit of excitement.
This section is also where you begin to realise just how long the hike really is. Even though the trail is still manageable.
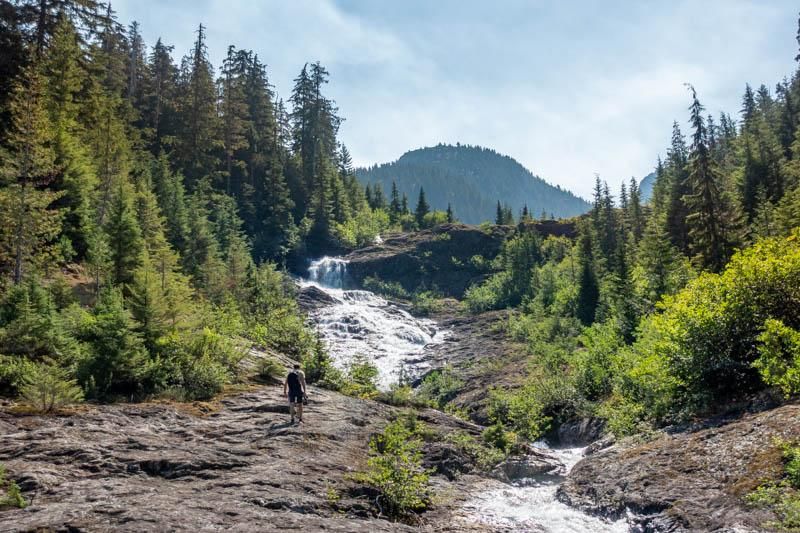
3. The Final Ascent: The "Sting in the Tail"
Don’t let the flat beginning fool you. After passing the second campsite, the character of the trail changes noticeably.
This is where the steepest and most physically demanding section begins. The terrain becomes rougher, with exposed roots, rocks, and a steady incline as you climb toward the lake.
Based on our Fitbit data, the distance here felt significantly longer than the trail signs suggested. While the signs might say you only have 3 km left from the camp, your legs will likely tell you otherwise.
This final push is definitely the toughest part of the hike, but it’s also the moment when you know you’re getting close to the reward.
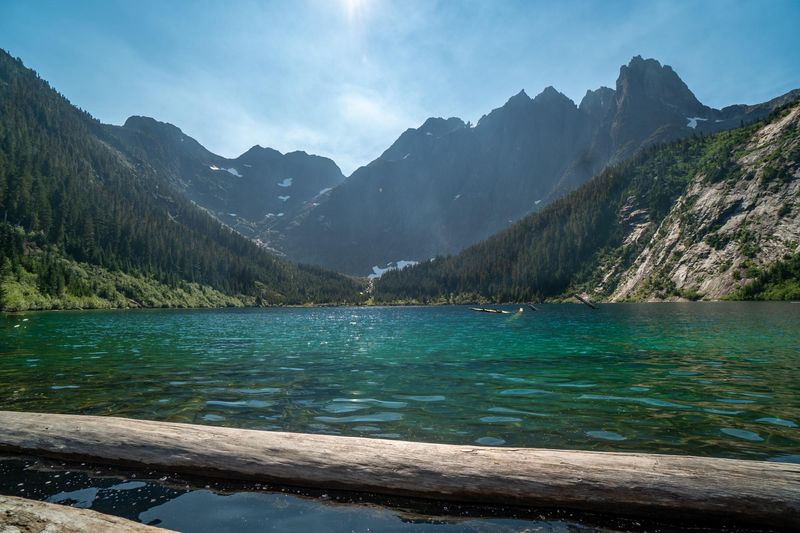
Reaching Landslide Lake: Swimming in the Lake
After hours of hiking, the moment you finally reach Landslide Lake feels incredibly rewarding. After nearly five hours of hiking, the forest finally opens up to reveal the lake. The view is spectacular, towering peaks and that iconic, milky-turquoise water. When we saw the lake, it honestly felt like every step had been worth it and we understood why so many hikers consider this one of the most beautiful hikes on Vancouver Island.
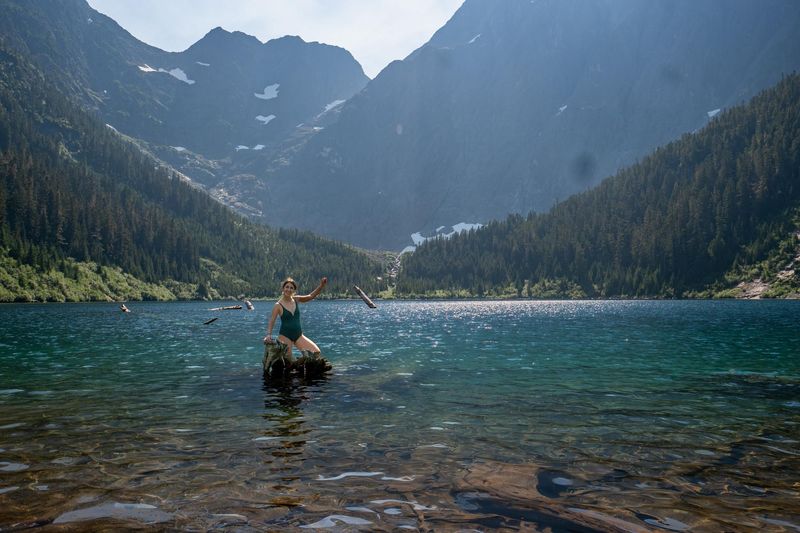
We stopped here for lunch and took some time to rest. One thing that surprised me was how quiet it felt. There were very few people around, and after such a long walk, it felt like we had truly reached somewhere remote.
The lake itself is fed by glacial water, which means it stays very cold even in summer. Despite that, it didn’t stop us from getting into the water. Bruno, my husband, had actually forgotten his swimsuit at the hotel, but he couldn't let me have all the fun. He ended up jumping in his underwear! It was freezing, as you’d expect from a lake fed by snowmelt, but incredibly refreshing after such a long trek.
The Journey Back and Lessons Learned
The hike back felt even longer than the way up. One thing we underestimated was our water supply. Even with the river nearby, the trail occasionally moves away from the water source for long stretches.
On our way back, we ran out of water with about 3 km to go. In the July heat, this was tough going. My advice: Fill up your bottles at every clear water point you find. If you have a portable water filter, it is an absolute essential for this hike so you don't have to carry the full weight of your water from the trailhead.
We finally reached our car after eight hours on the trail. Seeing the car park was one of the best feelings of the day.
Can You Extend the Hike to Berg Lake?
If you still have the energy after reaching Landslide Lake, it is possible to continue the hike further to Berg Lake, which is located about 2 km beyond Landslide Lake.
This extension adds roughly 4 km return to the total distance, making the hike even longer and more demanding. Berg Lake is smaller and less visited than Landslide Lake, but many hikers say it offers equally beautiful scenery and a more remote feeling.
We didn’t continue to Berg Lake ourselves. By the time we reached Landslide Lake, we had already been hiking for almost five hours, and knowing we still had the full return journey ahead, it felt like the sensible decision to stop there.
If you’re considering extending the hike, it’s worth planning carefully. Make sure you have: enough water, extra food, enough daylight and good energy levels. This extension is generally recommended for experienced hikers or those planning to camp overnight.
Is the Landslide Lake Hike Worth It?

Yes, but only if you’re prepared for a long day.
Landslide Lake is one of those hikes where the reward at the end truly matches the effort it takes to get there. It’s not an easy hike, and the distance alone makes it challenging, but reaching the lake and seeing that glacial water surrounded by mountains makes you realise why so many people recommend it.
For me, the moment we reached the lake was the highlight of the entire hike, after hours of walking through the forest, crossing bridges, and climbing the final steep section, seeing the lake felt like confirmation that every step had been worth it.
That said, this hike is not for everyone. The distance makes it physically demanding, especially on the way back. Even though the elevation gain is moderate, the length of the trail is what makes it tough.
If you prepare properly, start early, and manage your water carefully, this hike can be one of the most rewarding experiences on Vancouver Island.
Who Is This Hike Best For?
This hike is best for:
Hikers with good fitness levels
People are comfortable walking long distances (20–30 km)
Those looking for a full-day adventure
Anyone who enjoys remote scenery and backcountry-style hikes
It may not be suitable for:
Beginners with limited hiking experience
Families with very young children
Anyone not used to long-distance hiking
People who underestimate how much water and time this hike requires
Essential Gear for the Landslide Lake Hike
Because this is such a long hike, having the right gear makes a big difference. Based on our experience, these are some of the essentials I would strongly recommend.
Good hiking boots
This hike involves long distances, uneven terrain, roots, and rocks, especially in the final section. Having proper hiking boots with good grip makes the hike much more comfortable and safer.
Sunscreen
We did this hike in July, and the heat on the way back was noticeable, especially in exposed sections. Sunscreen is easy to forget, but very important on long summer hikes.
Water bottles and a portable water filter
Running out of water was one of our biggest mistakes on this hike. A portable water filter allows you to refill safely from streams without carrying excessive weight.
Bear spray and bear bells
Since this area is home to bears and cougars, carrying bear spray and bear bells to make noise along the trail is strongly recommended.
Final Thoughts
Landslide Lake is a bucket-list hike for anyone visiting Vancouver Island. It is a long, gruelling day that clocked in at over 30 km for us, so go prepared. Start early, carry bear spray, and don't forget your swimsuit (unless you're prepared to hike back in damp underwear!).